Why Wiki’s Suck

Wikis suck because they (as of yet) are never worth the additional complexity over regular web pages. They have a special syntax that can’t quite do exactly what web pages and links can do. They make some things easier, but others harder, the primary example being linking to a page within the wiki and a page “external” to the wiki.

Another major problem is that they are almost always focus on using templating languages rather than complete programming languages. This makes working with data sources (json, xml, recent statistics) a pain because the document is dead as soon as it is written. There is no way to express template generation within the language itself.

In order to overcome this wikis would need to be much more of an ecosystem.

Ability to create interactive visualizations that link to historic as well as current data.

At the bottom it should all be compiled into “regular” web pages so no special software would be necessary for hosting or interoperating with other static pages.

Rather than collecting words on a page, as in an encyclopedia, people using this kind of tool would collect data transformations, references, aggregations, and higher order functions related to simplifying these things.

Daniel X Moore Talks about HyperDev on The New Stack @ Scale Podcast

Daniel X just spoke on a podcast about HyperDev, organizational structure, and agility, check it out!

The New Stack @ Scale Podcast

“It’s easy to think that developer tools to make life easier for developers. It’s actually a lot broader than that. What we found when developing HyperDev is, as the barrier gets lower and lower, more people in the organization, people you might not traditionally think of as developers, are able to contribute, are able to build applications, are able to solve their own problems.” – Daniel X Moore

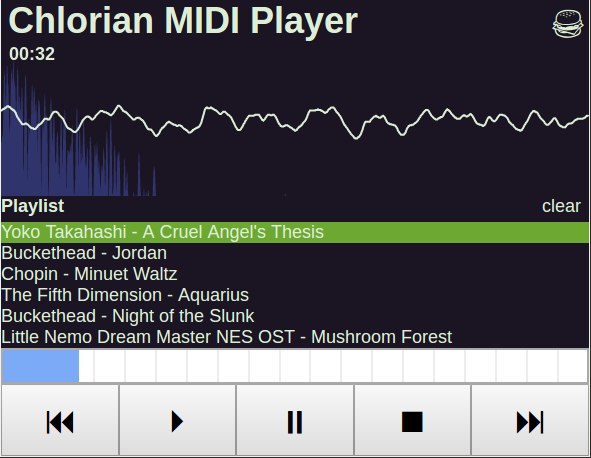
MIDIChlorian – Accurate Web Based MIDI Payer

Have you ever wanted to play a MIDI file on a computer but then found out that there’s no simple way to do it? I know I have! It’s criminal that we don’t have access to the magic of MIDI out of the box on these supposedly super advanced 2016 computers from the future… well no more! I’m going to let you in on a little secret, dear reader, I’ve been toiling away making the world’s best online MIDI player. You can simply drag MIDIs from your computer and drop them into MIDIChlorian (that’s a Star Wars joke for you) and they will play in a beautiful 4MB SoundFont, each track playing its own beautiful notes, timing to the microsecond. Amazing! Well, what are you waiting for? Go there and remember a simpler time, before mp3s, when anybody could remix music and share among friends. Go enjoy MIDIChlorian.

chlorian

GitHub Pages Custom Domain with SSL/TLS

The Overview

Route53 -> CloudFront -> github.io

You’ll get the joys of having SSL/TLS on a custom domain https://danielx.net backed by the ease of deployment and reliability of GitHub Pages.

The Price

  • Route 53 ($0.50)
  • CloudFront (pennies!)
  • SSL/TLS Cert (free!)

The Details

Get the certificate for your domain at https://aws.amazon.com/certificate-manager/. Be sure your contact details on the domain are up to date because Amazon uses whois info to find out where to send the confirmation email. I like to request a certificate for the wildcard as well as the base domain, i.e. *.danielx.net and danielx.net, that way I can use the same certificate if I want to have other CloudFront distributions for subdomains.

Screenshot from 2016-02-09 15:45:08

You’ll need to click through the links Amazon emails you so that they can validate your ownership of the domain and activate the certificate.

Next, create your CloudFront distribution. Choose “Web”. Configure your origin, in my case strd6.github.io. Choose “HTTPS Only” for Origin protocol policy, that way CloudFront will only connect to you GitHub pages over HTTPS.

Screenshot from 2016-02-09 15:55:14

Configure the caching behavior. Here I add OPTIONS to the allowed requests, I’m not sure if this is necessary since GitHub pages enables CORS by adding the Access-Control-Allow-Origin: * header to all responses. You also may want to customize and set the default TTL to zero. GitHub sets a 10 minute caching header on all resources found, but won’t set a header on 404s. This will prevent CloudFront from caching a 404 response for 24 hours (yikes!)

Screenshot from 2016-02-09 16:03:20

Here’s where we add our certificate. Be sure to set up the CNAME field with your domain, and be sure your certificate matches!

You’ll also want to set the Default Root Object to index.html.

Screenshot from 2016-02-09 16:13:28

You can also add logging if you’re feeling into it.

If your domain is hosted somewhere else you can transfer your DNS to Route53, otherwise you can set up the DNS records on your domain provider.

Create a Route53 Record set for your domain then create an A record. Choose Alias, and select the CloudFront Distribution as your Alias target. Note: you may need to wait ~10-15 minutes for the distribution to juice up.

Screenshot from 2016-02-09 16:17:53

Caveats

You need to be careful with your urls (you’re careful with them anyway, right?!). You must include the trailing slash like https://danielx.net/editor/, because if you don’t and do https://danielx.net/editor GitHub will respond with a 301 Redirect to your .github.io domain, and it won’t even keep the https!

If you hit a 404 CloudFront may cache the response for up to 24 hours with its default settings. This is because GitHub doesn’t set and caching headers on 404 responses and CloudFront does its default thing.

Hamlet Implementation

There are many existing frameworks and libraries in JavaScript that handle data-binding and application abstractions but none of them offer an integrated solution that works with higher level languages (CoffeeScript, Haml). You could come close with CoffeeScript + hamlc + Knockout or something similar but it would always be a bit of a kludge because they were never designed to work together.

There are three major issues that should be solved in clientside JavaScript applications:

  1. Improved Language (CoffeeScript, or Dart, TypeScript, etc.)
  2. HTML Domain Specific Language (Haml, Jade, Slim, others)
  3. Data-Binding (React, Knockout, others)

Hamlet is novel in that it provides a clean combined solution to these three issues. By building off of CoffeeScript in the compiler we get to have the same improved language inside and outside of our templates. haml-coffee provides a CoffeeScript aware HTML DSL, Knockout.js provides data-binding aware HTML, but no tool provided them together. What if we could truly have the best of both worlds?

%button(click=@say) Hello
%input(value=@value)
say: ->
  alert @value()
value: Observable "Hamlet"

This simple example demonstrates the power and simplicity of Hamlet. The value in the input field and the model stay in sync thanks to the Observable function. The template runtime is aware that some values may be observable, and when it finds one it sets up the bindings for you.

All of this fits within our < 4k runtime. The way we are able to achieve this is by having a compile step. Programmers accustomed to languages like Haml, Sass, and CoffeeScript (or insert your favorites here) are comfortable with a build step. Even plain JS/HTML developers use a build step for linters, testing, and minification. So granted that most web developers today are using a build step, why not make it do as much of the dirty work as we can?

The Hamlet compiler works together with the Hamlet runtime so that your data-bindings stay up to date automatically. By leveraging the power of the document object itself we can create elements and directly attach the events that are needed to observe changes in our data model. For input elements we can observe changes that would update the model. This is all possible because our compiler generates a simple linear list of instructions such as:

create a node
bind an id attribute to model.id
add a child node
...

As the runtime executes instructions it has the data that should be bound. Because the runtime is “Observable aware” it will automatically attach listeners as needed to keep the attribute or value in sync with the model.

Let’s follow the journey of our humble template.

             parser    compiler   browser+runtime
              |          |              |
haml template -> JSON IR -> JS function -> Interactive DOM Elements

The template starts out as a text string. This gets fed into the hamlet-cli which converts it into a JS function. When the JS function is invoked with a model, in the context of the browser and the Hamlet runtime, it produces a Node or DocumentFragment containing interactive data-bound HTML elements. This result may then be inserted into the DOM.

The parser is generated from jison. We use a simple lexer and a fairly readable DSL for the grammar.

There’s no strong reason to choose Haml over Slim or Jade, I just started with it because it was a syntax I knew well. The name Hamlet comes from “Little Haml” as it is a simplified subset of Haml. Adding support for a Jade or Slim style is as easy as creating a new lexer that with the appropriate subset of Jade or Slim.

Some of the simplifications to the language come from the power of the runtime to build DOM elements directly. We don’t need to worry about escaping because we’re building DOM elements and not strings. We can also avoid the DOCTYPE stuff and other server specific requirements that are not relevant to a clientside environment. Other reductions were chosen solely to make the language simpler, which has value in itself.

The core goal of Hamlet is to provide an HTML domain specific language that seamlessly inter-operates with CoffeeScript and provides bi-directional data binding. Each piece works together to provide an amazing overall experience. But you don’t have to take my word for it, try it out for yourself with our interactive demos.

Array#minimum and Array#maximum

Time for the next installment in 256 JS Game Extensions. It’s been a while hasn’t it? Well don’t worry because here are four new crazy cool additions to the Array class. This brings us up to 40!

Array::maxima = (valueFunction=Function.identity) ->
  @inject([-Infinity, []], (memo, item) ->
    value = valueFunction(item)
    [maxValue, maxItems] = memo

    if value > maxValue
      [value, [item]]
    else if value is maxValue
      [value, maxItems.concat(item)]
    else
      memo
  ).last()

Array::maximum = (valueFunction) ->
  @maxima(valueFunction).first()

Array::minima = (valueFunction=Function.identity) ->
  inverseFn = (x) ->
    -valueFunction(x)

  @maxima(inverseFn)

Array::minimum = (valueFunction) ->
  @minima(valueFunction).first()

Array#maxima is the core of this set, all the other methods are implemented based upon it. maxima returns a list of the elements that have the maximum value for a given value function. The default value function is the identity function which returns the item itself. This will work great for integers or strings: anything that correctly works with the > operator.

The value function can be overridden for example if you want to compute the maximum length word in a list you could pass in (word) -> word.length

The special case maximum delegates to maxima and returns only the first result. Similarly minima delegates to maxima but inverts the value function.

With these methods many problems that seem complex actually become quite a lot simpler by picking a value function and whether you want to maximize it or minimize it.

Red Ice Premortem – Hard Lessons in HTML5

Over the past two years I’ve been developing a multiplayer hockey game in CoffeeScript. What follows is a rough list of some things that I’ve learned.

And let’s be clear, these are all the mistakes I made before I got to the part where I built the game.

JavaScript
CoffeeScript is great as a programming language, but it’s still built on top of JavaScript. JavaScript has a few crippling problems when it comes to reusable libraries, like the lack of a require statement in the language itself. There are many tools that try to address this, falling mostly into two separate groups: compile/build tools and runtime tools.

Since I use CoffeeScript, a compile time tool fits well into my pipeline. For websites, generally I use Sprockets where you can explicitly require other files using special comments:

#= require player
#= require map
#= ...

This is good. Dependencies can be made explicit and you can require files from other files. The disadvantage is that this all happens during build time, so Sprockets itself doesn’t provide any way to require files at runtime. For rapid development some sort of guard script is needed to recompile all your files when any change. In practice this takes less than a second and changes are immediately available when refreshing the page.

Requirejs is an alternative that provides support for requiring additional files at runtime. This approach is great for development, but still requires a compilation step for optimizing distribution.

Either of these approaches work fine and the correct one to choose depends mostly on how well they integrate with the rest of your toolchain.

These problems would be mitigated greatly by a reliable and robust, game development-specific framework similar to Rails. There are many JS web development frameworks. There are even some that fit certain definitions of robust and reliable. I’ve even spent years trying to create one with its own crippling problems, but that’s a tale for another time.

As of yet I haven’t found any that I could recommend, and that’s coming from someone who spent three years building one. The features that I think are essential are:

  • Command line support
  • Packaging for web/download deployment
  • Rapid development environment
  • First-class testing environment
  • Extensions to core JavaScript libraries
  • Additional libraries specific to games
  • Dependency management as good as Bundler

Many people are working on these issues. For each one there are many attempts, but there isn’t yet an opinionated framework that brings them all together in a way that developers can get started with quickly and easily. The biggest problem is that even by choosing the most popular tool for each issue, you rapidly become the only person in the world who has used each of those tools together.

Distribution

HTML games provide a great multi-platform distribution mechanism: a website that players can go to and play the game directly in the browser. For selling a direct download, a zip file with a run.html file is easy to create – it’s pretty much the same as a zip of the website. Linux/Mac/Windows compatibility is practically free, though the major issue would be the player’s choice of browser. If it is extremely important that the game be played in a quality browser, Chrome Portable can be bundled with the game or provided as a separate install step.

Sharing with testers is also easy, just send a zip or link to the page where you’re developing your game. You could even host everything on Github Pages.

Gamepads

Gamepad support is now quite good in Chrome, but needs support from other major browsers. There are native plugins available that will enable all browsers on all platforms to provide equivalent gamepad support, but it’s too much trouble to assume players will install a plugin and too much additional work for developers to implement as well. Maybe if a plugin matched the API more exactly it would mitigate this from a developer perspective, but asking players to install native plugins defeats much of the gains from an HTML experience.

On the bright side, when playing Red Ice using Chrome, the gamepad support is better than most popular indie games. (Binding of Isaac, I’m looking at you!)

Multi Player

In an attempt to alienate all potential players, I originally designed Red Ice to be played 3v3 locally using XBox controllers. As you can see from this chart, number of friends drops rapidly when owning more than three controllers.

Right now Red Ice is 2v2, and that’s probably correct. I do want to do more experimental games with more than four players locally, but with six or more players, screen real estate starts to become an issue.

Using Multiple Cloudfront Domains with Paperclip

In order to speed up asset loading using a CDN is generally regarded as a good idea. It is also recommended to split up requests among separate hostnames to allow the browser to parallelize loading.

Enabling this in Rails with Paperclip is pretty easy, though the documentation isn’t extremely rich.

You’ll want to set the s3_host_alias option to a proc which determines the correct domain alias based on the id of the object the attachment is for.

  has_attached_file :image, S3_OPTS.merge(
    :s3_host_alias => Proc.new {|attachment| "images#{attachment.instance.id % 4}.pixieengine.com" },
    :styles => {
      ...
    }
  )

This sends requests to the following hostnames:

images0.pixieengine.com
images1.pixieengine.com
images2.pixieengine.com
images3.pixieengine.com

The best part is that the same image will always have the same hostname. I’ve seen some people suggest randomly choosing a domain, but that reduces caching potential as the same item could be requested from multiple different domains over time.